Build Pipeline: 16 builds, two clicks, four stores



Kugle uses 16 builds: the game, the game-server and custom tools, each in production and in development.
All of them are one click away, in an inspector that appears by itself when the Build Settings open.
Each build setup has its own scenes, has platform specific settings, and can move folders and run scripts before and after the build.
The .env copy, the upload script, pod install with the automatic setup and opening of the Xcode project, the folders the game server does not need. In short: automate, remove frustration and gain time.
The tool appears when the Build Settings open: Ctrl + Shift + B
It saves time, and it needs no documentation. A new programmer opens the build window, like every Unity user: the tool is already there, on the road everybody takes.
A whole cross-platform game studio build pipeline, automated in one click
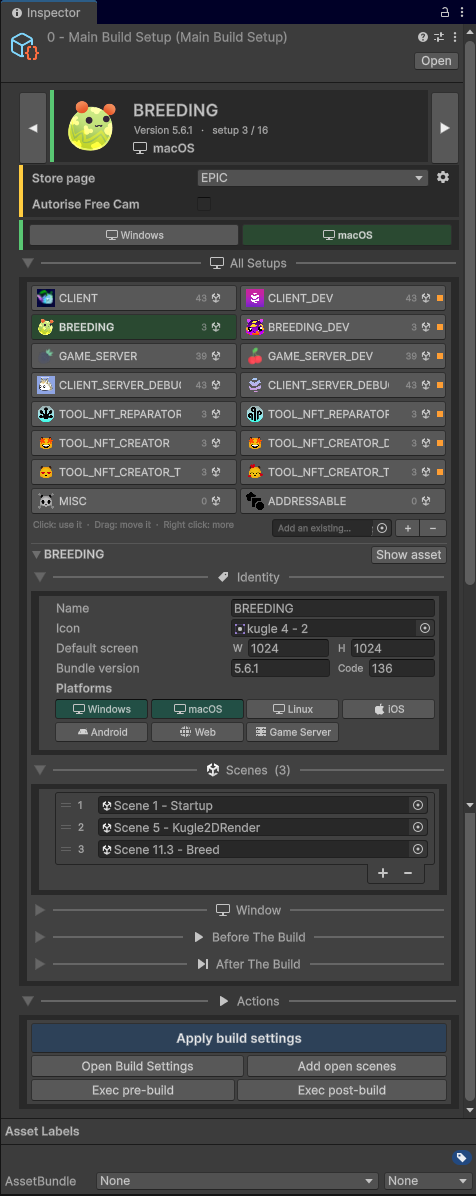
From top to bottom:
- The current setup: icon, name, version, platform. The arrows go to the previous and the next one.
- The important settings (yellow line): any field of any asset of the project.
- The platforms of the setup (green line): a click switches the project.
- All the setups, as a grid: a click uses one, a drag moves it.
- The setup itself: identity, scenes, window, steps before and after the build.
- The actions: apply the settings, open the build window, run the "before" or "after" steps alone.
The code of the game can ask which build it is in, by name:
if (MainBuildSetup.Instance.IsCurrent("CLIENT", "CLIENT_DEV"))
{
    // only in the game itself, not in the server or the tools
}
Any additional variable outside the plugin can be linked from a ScriptableObject. Very useful to collect all the custom variables in one place, and to keep the plugin separate from the project.
Before and after the build
A setup launches scripts, moves folders and applies platform specifics, before and after the build.
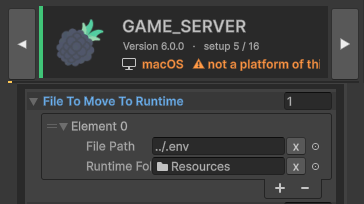
The passwords, for example: only the game server build gets a copy of the .env; the game players install never holds them.
From the build to the stores: one pipeline per store
One game, four stores. Every store has its own steps, its own tools and its own way of saying no. Pick a platform:
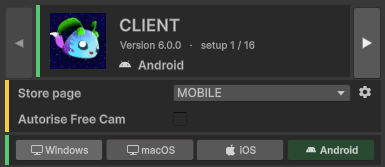
1. One click. Pick the CLIENT setup, choose Android, build. The bundle version code is shown right under the name.
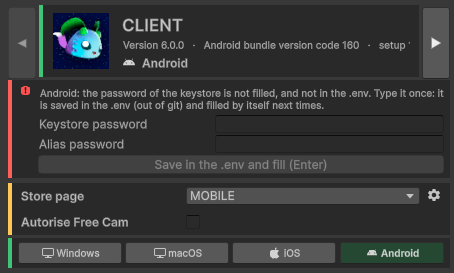
1b. The keystore password. Unity forgets it; here it is asked once, saved in the .env (out of Git), and filled in by itself at every build.
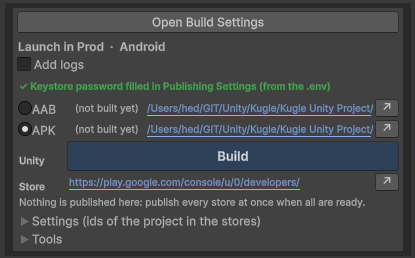
2. AAB or APK. The first one (Prod) is the Google Play file, ready for production. The second one (Dev) is a file to share and test on any Android phone. A click on Build opens the right folder, with the right file name already filled in.
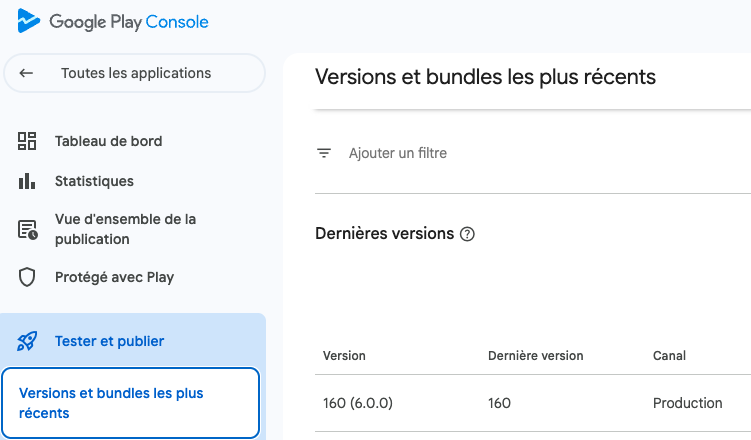
3. Publish. The .aab goes straight to the Google Play Console, opened on the releases page. No upload by hand.
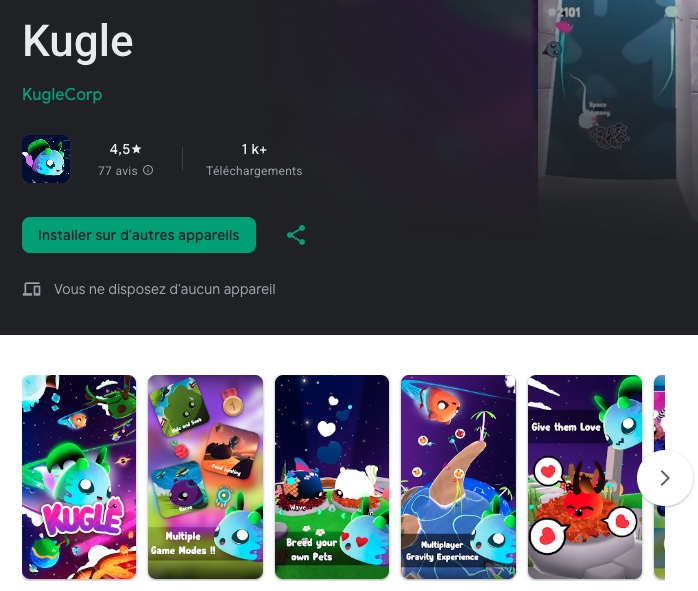
Last step: set the release date in the store. Congratulations! Your build is official. Kugle, live on Google Play.
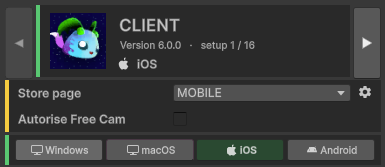
1. One click. Pick the CLIENT setup, choose iOS, build. Unity writes an Xcode project, not an app: the rest happens on the Mac.
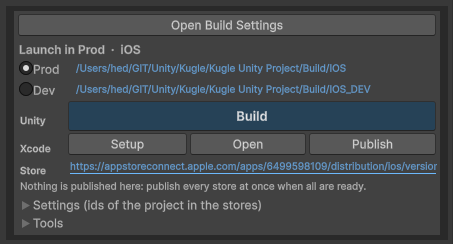
2. One button per step. Prod or Dev, then Build: Setup (pod install) and Open (Xcode) run by themselves after it.
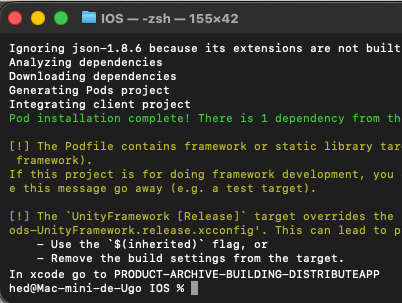
3. (Automatic) The dependencies. A terminal installs CocoaPods and the plugins, then opens Xcode.
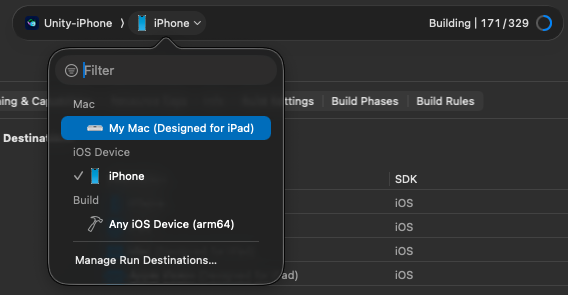
4. Xcode opens. Test the game on your iPhone or your Mac, or publish it: with the Publish button of step 2, or with Product > Archive, then Distribute App.
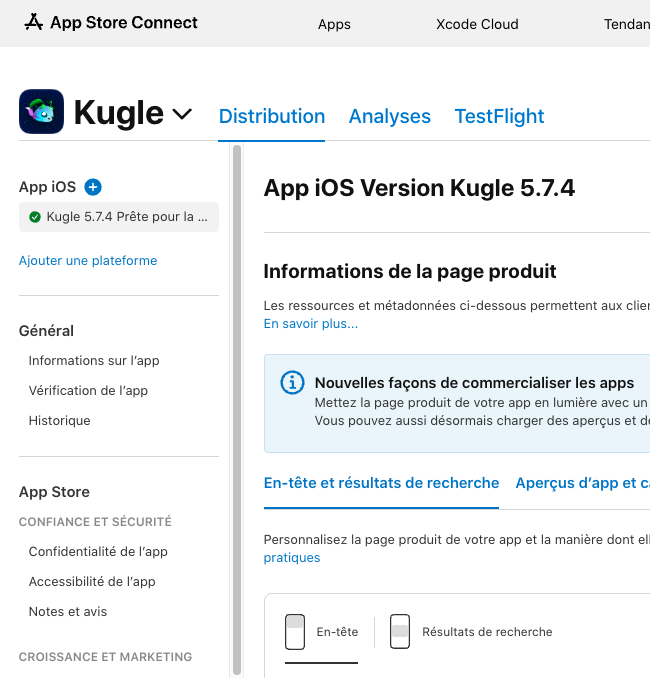
5. Ship it. Go to App Store Connect with the link of the panel (step 2), and publish it!
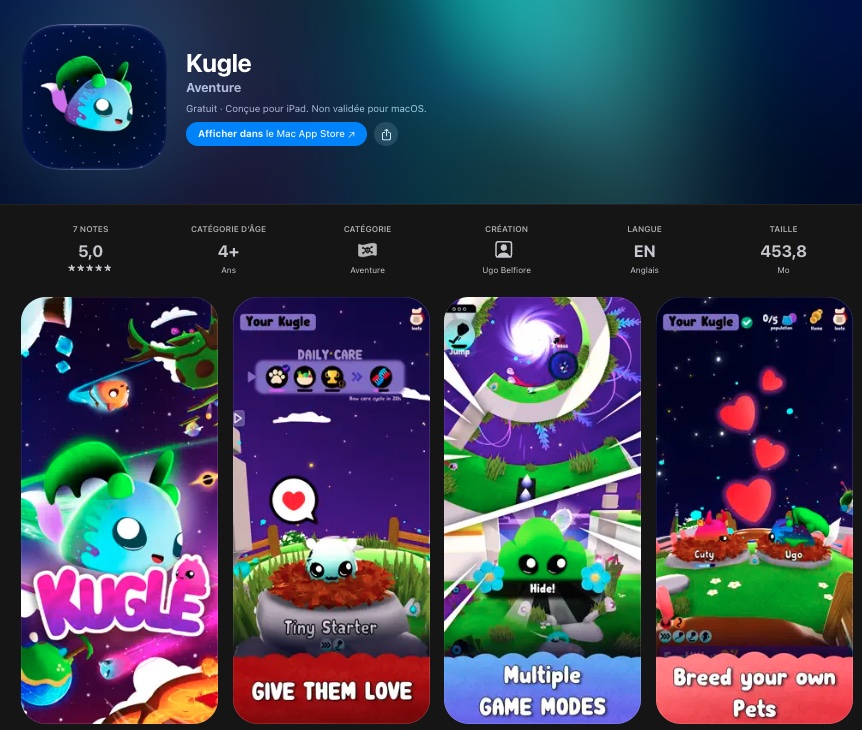
Last step: set the release date in the store. Congratulations! Your build is official. Kugle, live on the App Store.
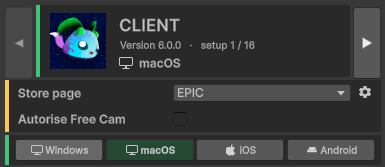
1. One click. Pick the CLIENT setup, choose Windows or macOS, set Store page to EPIC, build.
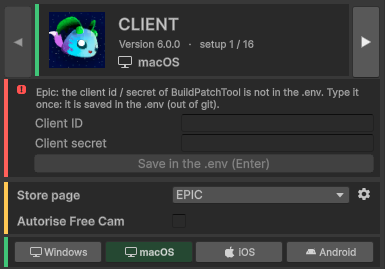
1b. The Epic upload keys. Client id and secret of BuildPatchTool: asked once, saved in the .env (out of Git).
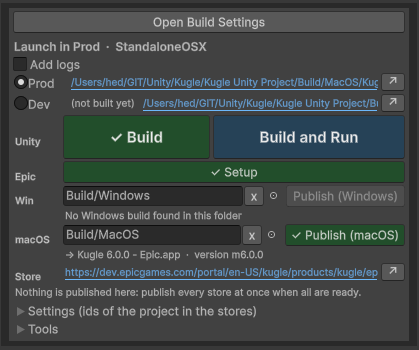
2. The big deal: three buttons.
- Build makes the build and puts it in the right folder, under the right name, for the context.
- Setup downloads Epic's upload tool, BuildPatchTool, and installs it, out of Git. Once it is there, the button turns green.
- Publish sends a Windows or macOS build to Epic, from a PC or a Mac: a folder, a
.appor a.zip, with the right name and version.
The Store link then opens the Epic Dev Portal, where the binary is given to its platform.
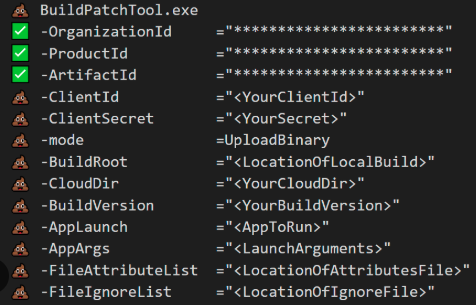
3. (Automatic) Every parameter, filled in. BuildPatchTool opens in a terminal with every parameter already in place, taken from the .env and the settings of the tool: the ids of the product, the keys, the build folder, the version, the file to launch. Nothing to type.
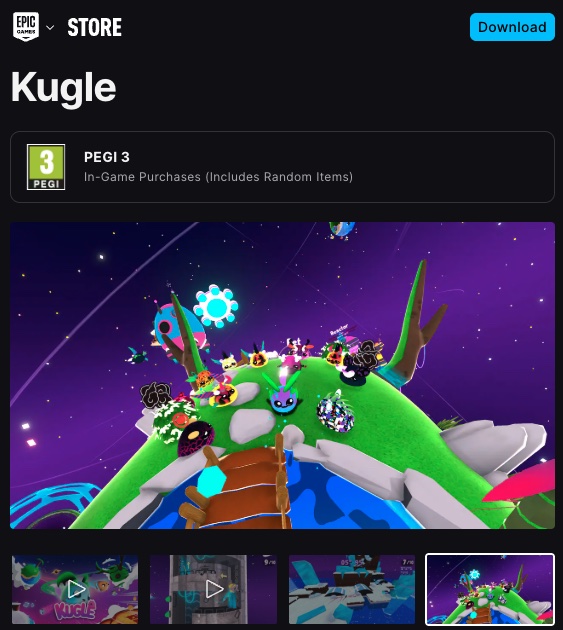
Last step: set the release date in the store. Congratulations! Your build is official. Kugle, live on the Epic Games Store.
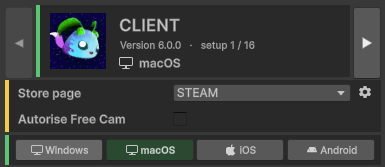
1. One click. Pick the CLIENT setup, choose Windows or macOS, set Store page to STEAM, build.
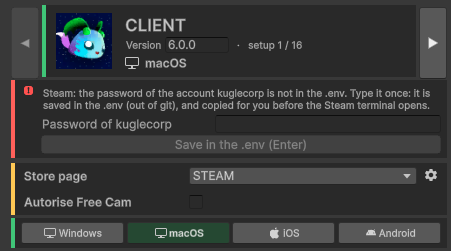
2. The Steam password. Asked once, saved in the .env (out of Git), and copied for you when SteamCMD needs it. Never written in a script.
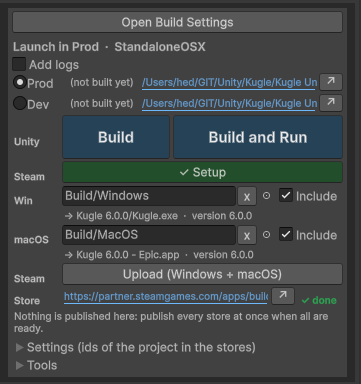
3. One upload for both. Setup installs SteamCMD. Each platform finds its build, tick Include, and one button sends Windows and macOS together.
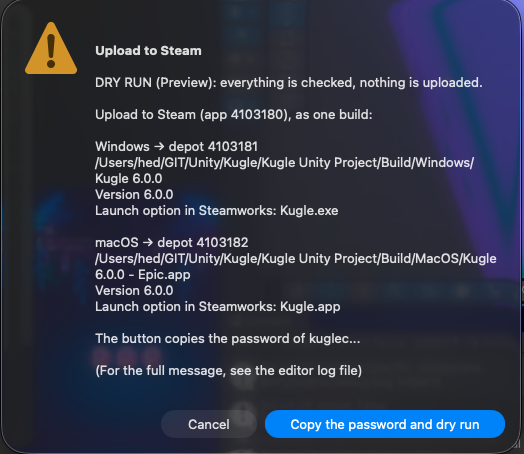
4. Checked before it leaves. App, depots, versions, launch options: all on one screen. One click copies the password saved in the .env and starts the Steam build process.
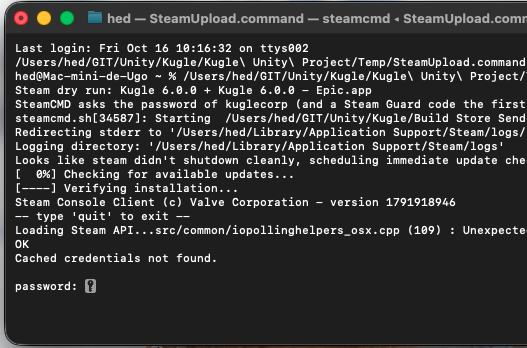
5. (Automatic) SteamCMD opens. It asks for the password: paste, done.
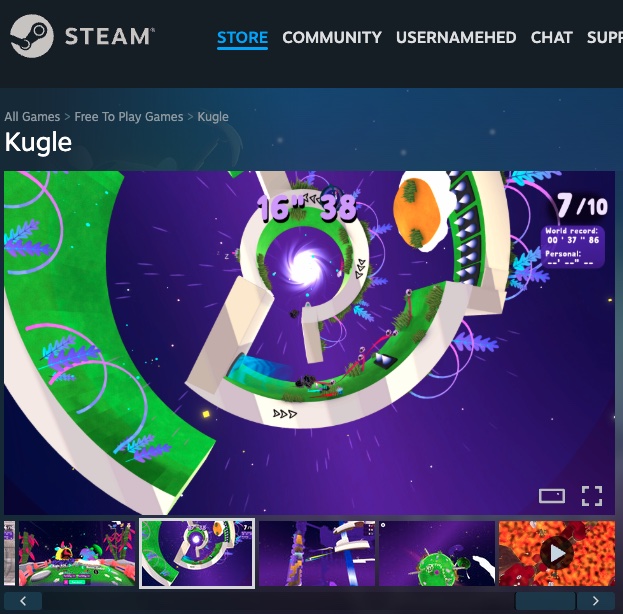
Last step: set the release date in the store. Congratulations! Your build is official. Kugle, live on Steam.
Additional settings: the store ids, filled in once
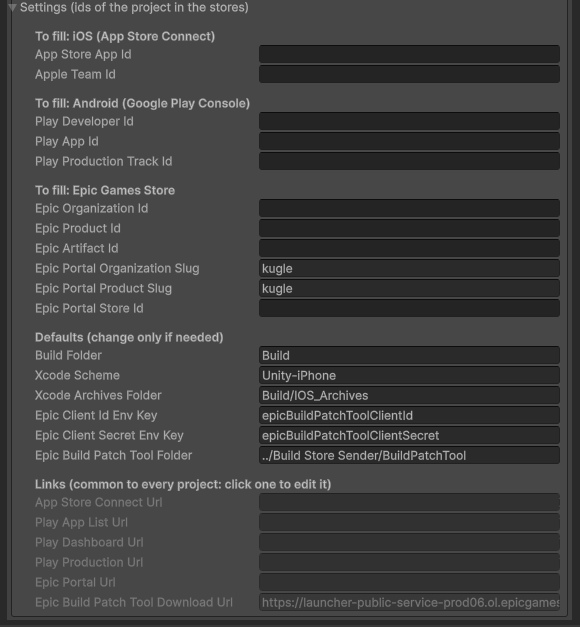
Every button reads its ids from one panel (App Store Connect, Google Play Console, Epic Games Store), filled in once per game. Below them: the build folder, the Xcode scheme, the archives folder, the Epic upload tool. The Epic secret stays in the .env file: the panel only holds the name of its key.
See also
- .env files in Unity: the secrets only some builds receive.
- EditorOnly components and actions when building: remove components from the build, scene by scene.
- Scene Context Loader: load a context of scenes in one click.
- Kugle Corp: the studio these tools were made for.